Motion Sensors
The motion sensors are accessed with the NXPMotionSense library.
To begin, upload File > Examples > NXPMotionSense > CalibrateSensors. Then open the Arduino Serial Monitor. You should see raw data printing rapidly.
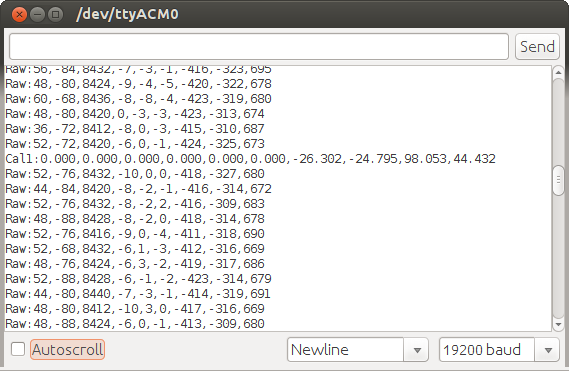
Close the serial monitor, and then run the Motion Sensor Calibration Tool.
Use the Port menu to select the serial port. Arduino's serial monitor must be closed.
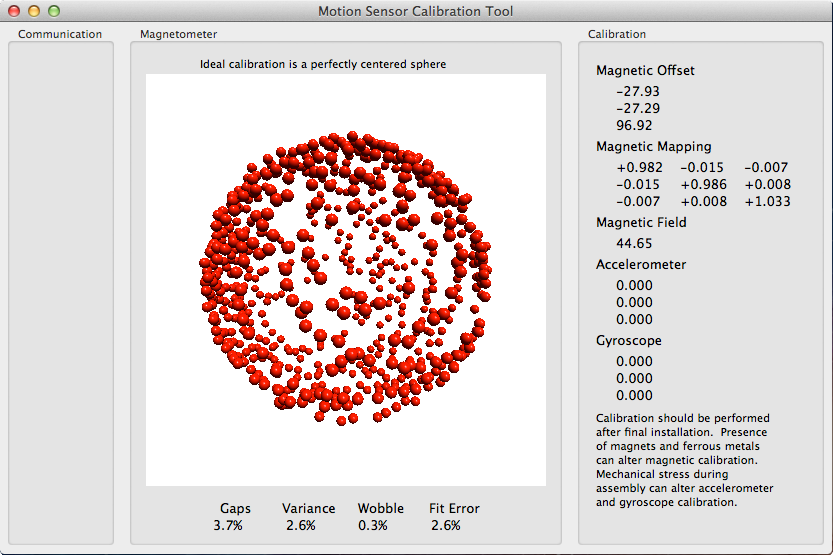
Rotate the Prop Shield to collect calibration data. As better data is collected from many angles, the 4 error numbers will decrease and the red dots will form a sphere which rotates perfectly centered. Use File > Send Calibration to write the calibration data to Teensy's EEPROM memory.
After calibration data is written, you can run either of these examples to use the calibrated data. MahonyIMU requires much less processing power, so it's recommended for Teensy LC and regular 8 bit Arduino boards.
File > Examples > NXPMotionSense > Orientation - Use on Teensy 3.2
File > Examples > NXPMotionSense > MahonyIMU - Use on Teensy LC or Arduino
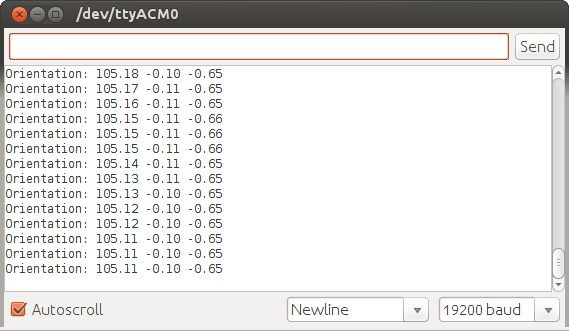
When either of these is running, the Arduino Serial Monitor will show you computed Heading, Pitch and Roll. As you turn the board in each direction (imagine it's an airplane), you should see each angle change.
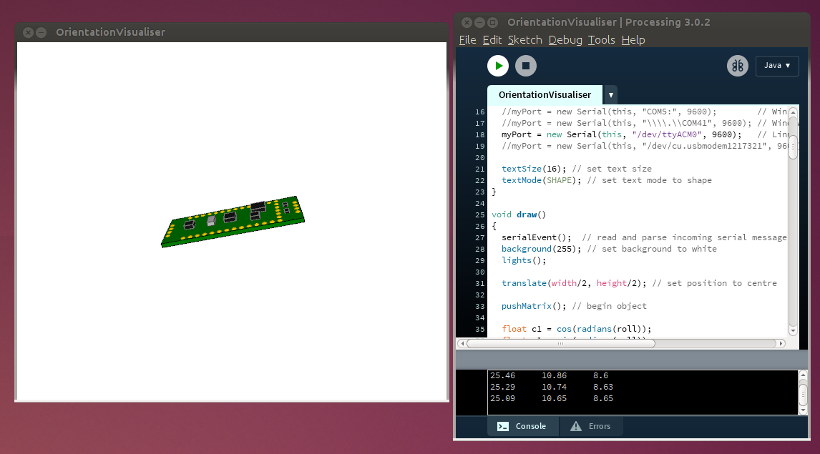
To see the orientation data in graphical form, use Processing to run the Orientation Visualizer. You many need to edit this code with your serial port name. Of course, close the Arduino Serial Monitor window, so the Processing sketch can access the data.
Audio Amplifier
The Prop Shield has a 2 watt audio amplifier, capable of driving 4 or 8 ohm speakers. 4 ohm car speakers work very well for permanent installations where louder sound levels are needed.
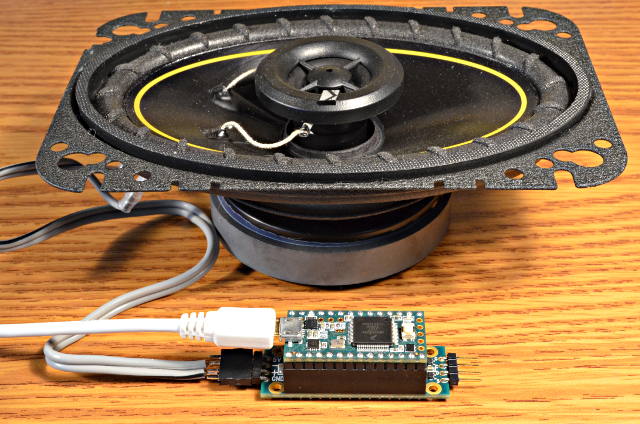
By default, the amplifier remains in a low power mode. You must drive pin 5 high to turn on the amplifier. It typically needs 8 milliseconds to wake up.
void setup() {
  pinMode(5, OUTPUT);
  digitalWrite(5, HIGH); // turn on the amplifier
  delay(10);             // allow time to wake up
With Teensy 3.2, the Teensy Audio Library can be used to create sounds. Nearly all the audio library examples are designed for the Audio Shield. To adapt them for the Prop Shield, replace "i2s1" with "dac1" in the Design Tool, or AudioOutputI2S with AudioOutputAnalog in the Arduino code. Then delete the SGTL5000 object and any code which uses it.
By default, the audio library will create a 1.2Vp-p signal at the DAC pin, which is a comfortable volume level for listening in a quiet room, but not nearly the amplifier's full power. To get louder output, set the dac1 object to use EXTERNAL reference. Doing this before powering up the amp will avoid a loud click.
  AudioMemory(20);
  dac1.analogReference(EXTERNAL); // much louder!
  delay(50);             // time for DAC voltage stable
  pinMode(5, OUTPUT);
  digitalWrite(5, HIGH); // turn on the amplifier
  delay(10);             // allow time to wake up
For fine volume control, use a mixer object just before the dac outuput in your audio design, where your code can control the mixer gain to change the volume.
On Teensy LC, the Talkie library can be used for simple voice synthesis.
Fast LED Driver
The Prop Shield has 5V buffers meant to send data to Dotstar or APA102 type addressable LEDs.

Normally the FastLED library is used to control these types of LEDs. The Prop Shield uses pin 7 to control access to the LEDs. If no other SPI chips are used, it can simply be set high in setup().
#include <FastLED.h>

#define NUM_LEDS 144
CRGB leds[NUM_LEDS];

void setup() {
  delay(2000);      // sanity check delay
  FastLED.addLeds<APA102, BGR>(leds, NUM_LEDS);
  pinMode(7, OUTPUT);
  digitalWrite(7, HIGH);  // enable access to LEDs
}

void loop() {
  // Move a single white led
  for(int n = 0; n < NUM_LEDS; n++) {
    leds[n] = CRGB::White;
    FastLED.show();
    delay(8);
    leds[n] = CRGB::Black;
  }
}
When other SPI communication is used, pin 7 must be HIGH to allow LED access and LOW to prevent other SPI chips from interfering with the LEDs. The SPI transactions functions should also be used. You will need to include SPI.h to have access to these SPI functions.
    // beginTransaction prevents SPI bus conflicts
    SPI.beginTransaction(SPISettings(24000000, MSBFIRST, SPI_MODE0));
    digitalWrite(7, HIGH);  // enable access to LEDs
    FastLED.show();
    digitalWrite(7, LOW);
    SPI.endTransaction();   // allow other libs to use SPI again
Flash Memory
The Prop Shield has an 8 Mbyte flash memory, meant to storing sound clips, images, logging data, or other uses.
The SerialFlash library is used to access this memory.
Use TeensyTransfer to copy files to the flash chip without a SD card.